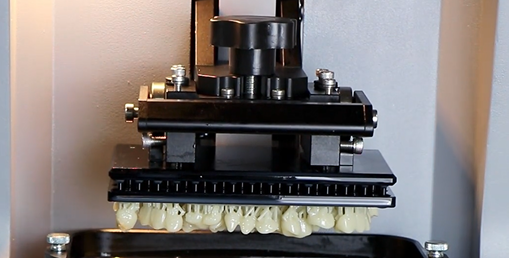
Dental printers are essentially specialized 3D printers that transform a dental device into a real device through the three steps of "digital oral scan → computer design → layer-by-layer material deposition." Depending on the materials and light source used, they can be categorized as "light-curing resin printers" and "metal printers." While the daily workflow in a clinic or laboratory is identical, the underlying principles differ slightly.

I. General Workflow
1. Intraoral Scanning: The doctor uses an intraoral scanner to obtain high-precision 3D data (STL/OBJ) of the patient's dentition and gingiva.
2. CAD Design: Crowns, bridges, implant guides, orthodontic models, etc. are designed using dental CAD software.
3. Slicing: The software slices the 3D model into 2D sections 25–100 µm thick and generates printing instructions.
4. Printing: The dedicated dental 3D printer cures the resin or sinters the metal powder layer by layer according to the instructions.
5. Post-Processing: Ultrasonic cleaning → secondary light curing/heat treatment → support removal → polishing → disinfection before clinical use.
II. Photocurable Resin Printers (Over 90% of Clinical Uses)
1. Technology Route
• SLA (Solid Laser Lamination): A single UV laser beam draws dots on the surface of liquid photosensitive resin, then lowers the platform to cure the next layer after each layer.
• DLP (Digital Light Projection): An entire cross-sectional image is projected onto the resin surface via a digital projector, curing the entire layer simultaneously. This results in faster printing speeds, but the resolution decreases with larger formats.
• MSLA/LCD: This utilizes an LED array + LCD mask instead of DLP projection, balancing speed and cost. It is currently the mainstream chairside printing solution.
2. Key Working Principles
① Biocompatible dental resin is placed in the resin tank;
② A light source selectively illuminates the sample according to the slice image, causing photopolymerization in the exposed area to form a solid film;
③ The Z-axis stage descends in 25–50 µm increments, allowing the liquid surface to re-spread, and exposure is repeated until the sample is complete;
④ The finished product is removed from the stage, the uncured resin is cleaned with alcohol, and then placed in a UV curing chamber for secondary hardening to achieve clinical mechanical strength.
III. Metal Dental Printers (for cobalt-chromium crowns and bridges, titanium alloy implant rods, etc.)
1. Technology Route: Direct Metal Printing (DMP, also known as Selective Laser Melting (SLM)).
2. Key Working Principles
① A powder bed is filled with a 20–40 µm thick layer of metal powder (cobalt-chromium, titanium alloy, or nickel-titanium);
② A high-power 500 W fiber laser, in an inert argon atmosphere, melts the powder point by point along the slice path, metallurgically bonding it to the underlying layer;
③ The platform descends one layer, the scraper reapplies the powder, and the laser scans again, repeating the cycle until the print is complete;
④ After printing is complete, excess powder is removed, and wire cutting, heat treatment, sandblasting, and machining and polishing are performed to ultimately produce a dense metal restoration.
IV. Key Differences and Clinical Choices
• Resin-based printers: 25–50 µm accuracy, suitable for same-day production of temporary crowns, implant guides, and orthodontic models, with a lower cost.
• Metal-based printers: 30–50 µm accuracy, with strength and wear resistance meeting long-term restoration requirements, but the equipment and powder costs are high, making them primarily used for centralized production in laboratories.
In short, dental printers transform "optical/laser energy + biomaterials" into patient-specific tooth parts. The core is "layer-by-layer imaging, layer-by-layer curing/sintering", supplemented by dental-grade post-processing, and the device can be safely used in the dental chair.